A slider is a powerful technique to display multiple sections of text and visualisations in just one screen. It is for no reason that it is wildy popular and used on many websites. In this article I want to describe how you can make a custom slider in WordPress, using custom post types, jquery flexslider and metaboxes.
It is assumed that you have basic understanding of WordPress and understand HTML and CSS well.
Step 1: Registering a Custom Post Type
With register_post_type, it is possible to register a custom post, which enables you to have another type of posts besides the normal posts that are present in WordPress. The first piece of code need to placed in the functions.php file of your current theme (or any file you use to store the functions of your theme).
This will register a post type called slider_feature, which has a menu header and name ‘Feature Slider Items’, and it is a public (not private) post. Since this post does not need to be viewed in an archive,’ has_archive’ can be set too false. [pull class=”right”]”register_post_type registers a custom post type”[/pull] For the slider, we want a title, a box to put the body text of the slider in and some custom fields which allow to add a link and an image for the slider. The values of ‘supports’ allows us to manual enable this options. View the Codex for more information on the register_post_type arguments (there are many options such as add custom categories, custom columns for displaying the post information, etc.).
Step 2: Adding custom meta boxes to the Custom Post
Using the following arrays and functions (thanks to Matt Brett & WordPress Codex), it is possible to add custom fields to the custom posts. The following couple of arrays define the 2 custom fields/metabox that are used: one for the image, and one for the url the slider need to link to. Following, these custom fields need to appear on the the post page as an input text type as is defined by the later functions. As can be seen in the last function the function is used to add metaboxes that are defined by the function slider_custom_fields() and added to post type slider_feature. The data filled in the metaboxes also needs to be saved and we need to hook our functions. That makes up our code:
Note: If we want to grab a value of a custom field, we have to use the name of this value + _value added (e.g. get_post_meta(slider_image_value)).
That concludes the code that is needed in the functions.php file. As you can see, I also registered the necessary styles and scripts. I registered the Javascript on purpose in the footer, as defined by the last ‘true’ which you can see in the wp_enqueue_script functions. WordPress automatically places it just before the body tag.
Why javascript before body tag?
While javascript is usually placed in the header, in terms of site optimalization it is better to place javascripts in the footer. When placed in the header, the (larger) javascripts will block the loading of all the html elements that are after them, untill they are fully loaded. The disadvantage is that the slider wall appear as the last element, since the javascripts need to be loaded to let the slider appear.
Step 3: Querying the posts and retrieving the custom meta boxes
First, download the slider from http://www.slidesjs.com/, which is an excellent slider made by Nathan Searles. The slider used is from the ‘slider with caption’ example, but you only need the slides.min.jquery.js from the js folder and the arrow-next.png, arrow-prev.png, pagination.png and loading.gif images from the img folder.
Now save the following part of code in any location in your theme, for example in views/slider-template.php. This code loops through each of the slides that is added in your dashboard, and only adds an image if we have pasted a link in the metabox.
Now, you can use the following code at the place were you want the slider to appear, e.g. on index.php.
get_template_part('views/slider-template.php');
Now the slides are placed in a slides container, and we can set the $args for the new WP_Query to the post type we want, in this case the slider_feature post type we registered in the first step. Additionally, we could add more arguments in the $args variable.
In this case, the slider will show a maximum of 10 posts. There are a lot more arguments possible, which e.g. enables to sort the slider posts on a certain kind of manner. More on this can be found in the WordPress Codex. Note that posts_per_page is used instead of the popular showposts, which is deprecated since wordpress 2.1, but still is used in many themes. As you can see in the code, using get_post_meta and the standard tags for the title and content will get the content from what you’ve filled in the dashboard.
Step 4: JavaScript values for the slider
Paste the following JavaScript just before the closing of the body tag (unless you want the slider to load first, then move it up together with jQuery in the head tag). I added this in a separate functions.js file which is the preferred way to go, but you can also add it in the same document were your slider is (in the latter cases, don’t forget the script tags!).
The slides will slide with a speed of 1.25 second, when hovered they will pause. I used a value of 10.000 (=10 seconds) for play and pause, so someone has enough time to read the text on your slider. Based on the amount of text you are planning on the slider, you can adjust these values. The effects are applied in the slides within the .slides.
A small update:
As you can see, this tutorial was written some time ago. In the meantime, the SlidesJS has had some updates. For the current settings of the SlidesJS slider, see the documentation halfway the page.
Step 5: Style the sliders
Without the styling, the sliders will still look crap. But that is going to change with CSS: The following styling will determine the width of the slider and the width, height and position of the caption. It makes the caption semi-transparent, and gives the slides container a subtle box-shadow (these are all CSS 2+ or CSS3 features). I’ll not go any deeper into the css, since the focus is on the custom posts, but this is an indication of what can be made relatively easy.
Step 6: You should be finishing by now!
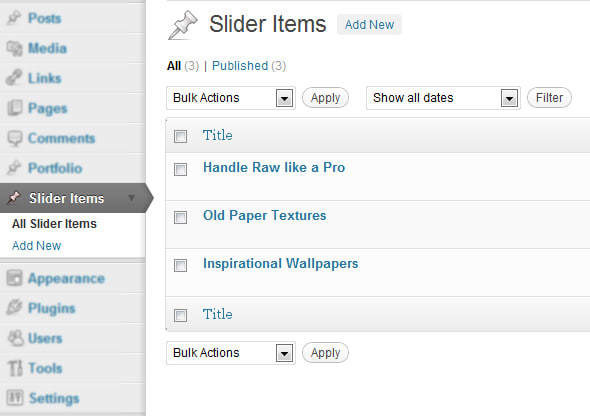
Now, in your WordPress dashboard, you should have the ability to see a new menu called slider items, and you should be able to add sliders, as shown in this example:
And the edit screen will look like this. A caption does not use many text, but still the editor is used: this makes it easier to upload images for your slider, and paste the url in the custom field for the image.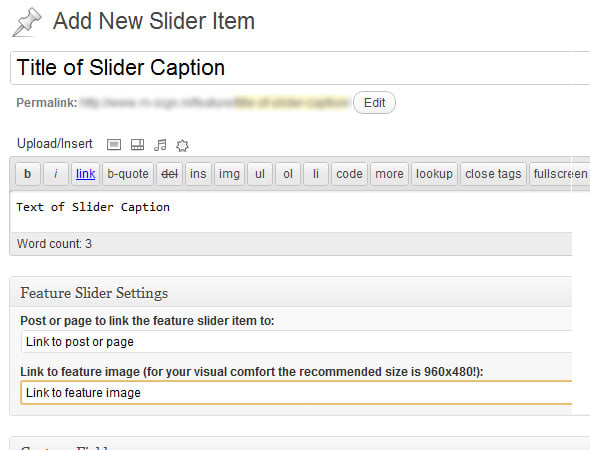
That’s all! Questions or suggestions? Drop a comment!
View code on github