Love, it is ony of the most common themes of music, paintings and many forms of art. And today, we are going to bring some love to Adobe Photoshop. In this tutorial you are going to make this beautiful wallpaper, using Photoshop. The outcome will be more or less as the image you can see in the results of this tutorial.
The render was made in a 3d application, but this tutorial will stick to the parts that were done in Adobe Photoshop. This tutorial will be done in the ‘underlaying-layers-method’, which means that the tutorial will start with the bottom layer of the document as the first step and will end with the top layer. So let’s start!
Step 1
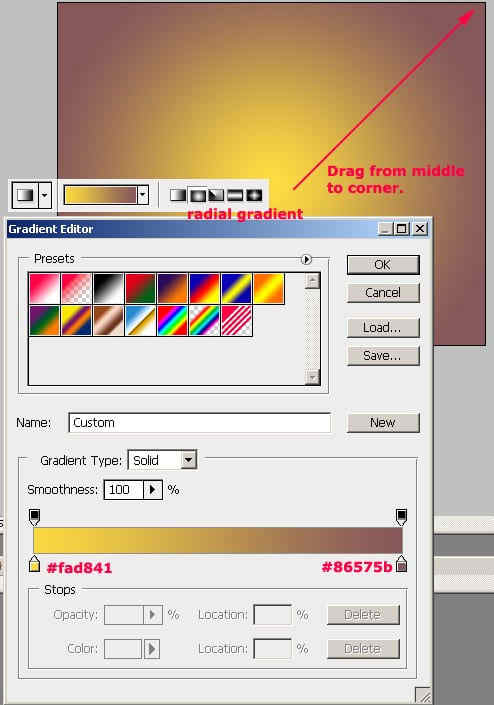
Start by creating a new file (File > New or Ctrl+N), and make it 1024 pixels wide and 1280 pixels high, with 72 pixels/inch (or any resolution you prefer). Name your first layer ‘BackGround’ or ‘B’ and select the gradient tool (G). Click on the ‘gradient’ on the top to edit, make sure you also have selected radial gradient and use the colors shown in the image below (#fad841 and #86575b). Drag the gradient from the middle of the canvas to the corner.
Step 2
Now a brick texture will be added, for a very subtle effect. In our final image, we want love to come ‘break through’ and the slight visible brick wall will add to this effect. For example this brick texture, shot in my neighborhood. Download the version and place it in an appropriate way in the document, and name it ‘bricks’. Desaturate the texture (Image > Adjustments > Desaturate or Shft + Ctrl + U ), and apply the following filters:
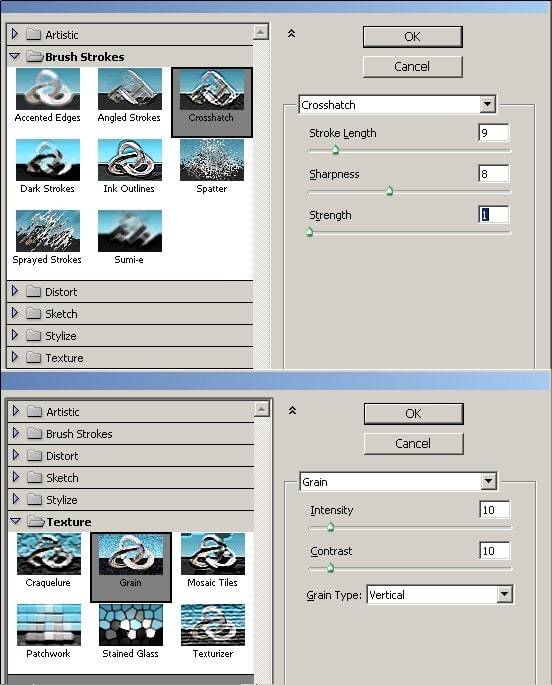
After applying the filters, set the Blend Mode of the Layer on Overlay and add a Layer Mask. This Layer Mask will allow us to (partially) show or hide something from this layer. By brushing with black in the Layer Mask, these area’s will be invisible, and using white will make them visible again. This is better as the Eraser Tool, as it allows us easily to adapt the layer if we removed too much. Brush (B) with black (#000000), with a soft edged brush sized around 500px (press { or } to increase the Brush Size while having the Brush Tool selected), mostly in the middle in your Layer Mask (make sure you selected your Layer Mask and not the Layer itself!). Set the Fill of the ‘Bricks’ layer around 10-25%, depending on how much you want the brick layer to be visible. In the image below you can also see what parts of the layer mask I brushed black.

Step 3
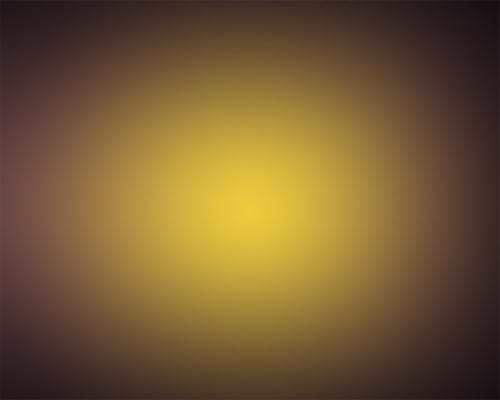
Still having the Brush Tool, 500px Soft Edge and black color, selected, make a new layer and name it ‘Dark Border’. Lower the Opacity of your Brush Tool to 25% and carefully start brushing in the corners and borders, until you have something like this:
Step 4
We are going to use a pattern, but it has to be defined first. So open up a new document (Ctrl + N ), 450px wide and 150px high, and make sure it has a transparent background. Select the Type Tool (T), use the font Gill Sans MT, bold with strong anti-aliasing, color white (#ffffff) and use a font size of 144pt.
Type ‘LOVE’ (so with capitals), and place this word exactly in the middle (using the Move Tool (V)). Go to Edit > Define Pattern and choose a suitable name, and hit Ok.
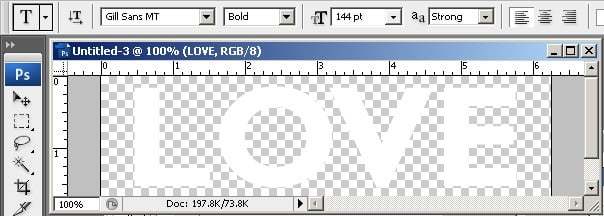
The pattern is ready, now make a new layer in the document we’re already working in, and name it for example ‘Pattern’. Select the whole layer, using the Rectangular Marquee Tool (M), right mouse on your select and select Fill. Choose the pattern you just made, keep the Opacity at 100% and the Mode on Normal. After filling the selection with the pattern, rotate the whole layer about -45 degrees using Free Transform (ctrl + T).
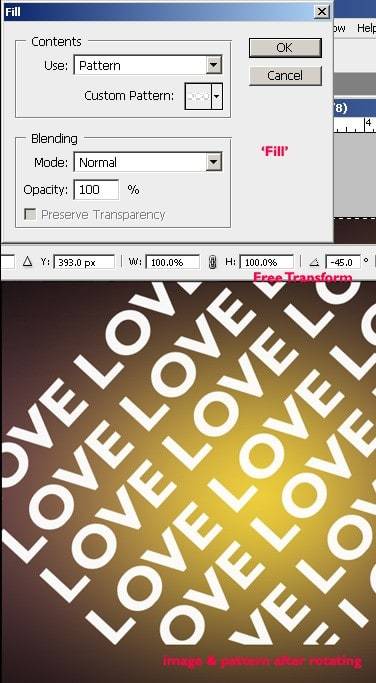
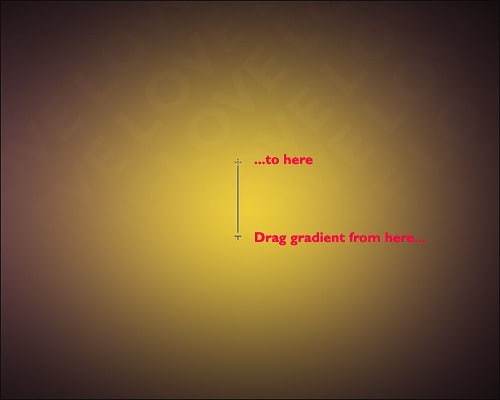
A Layer Mask will be used again for hiding some areas we don’t want to see. Add a Layer Mask and draw a (black foreground and white background) Linear Gradient in the middle. After this, set the Blending Mode of this Layer to Overlay and lower the Fill to 3% (or a little bit higher, if you want it to be more visible).
Step 5
Now some more font will be added. This wallpaper was based on a song, so I took some of the lyrics, but of course you can add something very inspirational of your own : )! As you can see below you can make three lines of text, also using slashes. This can be done either by using enters and spaces or using multiple text layers. Use Gill Sans MT, bold, 36 pt and Smooth anti-aliasing. The color of the slashes is #ff2400 and of the text #ffffff. Finally lower the Fill of this / these layer(s) to 50%.

Step 6
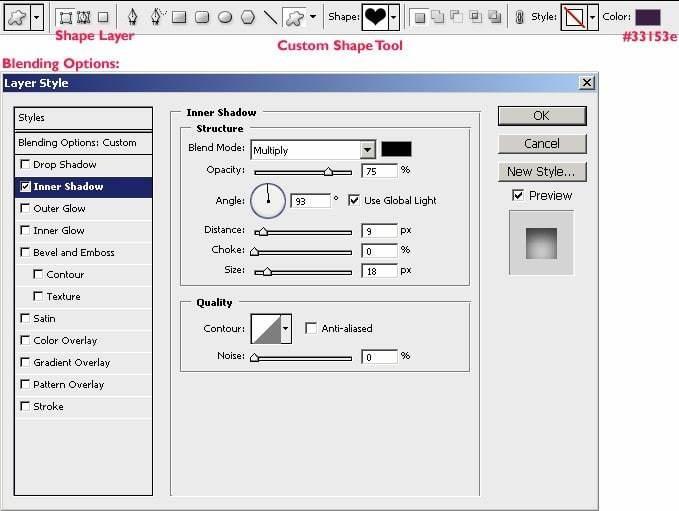
Now it is getting more lovely! Add a New Layer (ctrl+ shift + N), go to the custom shape tool, and choose the heart shape. Make sure you selected the heart shape and ‘Shape Layers’ is selected. Now draw a heart in the middle, which covers the complete middle (as shown in the second picture below). Change the color of this shape layer to #33153e and set Blending Mode to Overlay. Now go to the Blending Options of this layer (right mouse while hovering layer > Blending Options. Add Inner Shadow, settings are shown in the image below):
Step 7
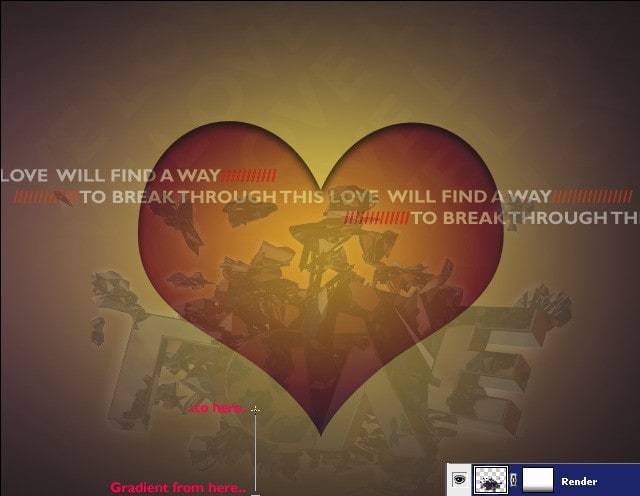
Now we arrived at the final part of this tutorial, we already have a decent background, but now the render will be added. Download the renders here. Place the render in the middle of the document, make sure it is the top Layer, name it ‘Render’ and duplicate it 2 times. Hide the top ‘Render Layer’ (by clicking on the ‘eye’ next to the Layers), as this one will be used later. Select the (unhidden) layer and apply Flip Vertical (Edit > Transform > Flip Vertical). Drag this layer to the bottom, using the Move Tool (V). Add a Layer Mask to this Layer, draw a black (foreground color) to white (background color) Gradient in the bottom of this Layer Mask and set Fill of the Layer to 25%.
Step 8
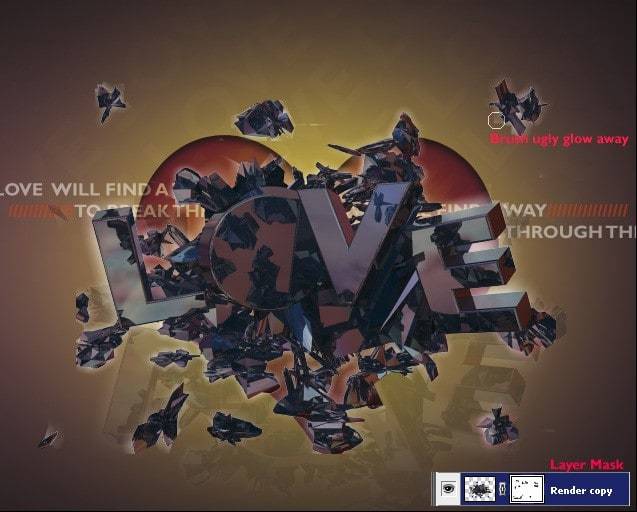
Unhide the next Layer (Render Copy), so the Layer above the ‘Render Layer’ in Step 7. This layer is still in the middle, if you did everything right, and we don’t need to move it. Observing the layer, we see some ‘blocky’ parts of glow around the Render, which could be softer. Add a layer mask, and in this Layer Mask using a Black Soft Brush, with Low Opacity (25%), erase the unwanted parts of the render.
Step 9
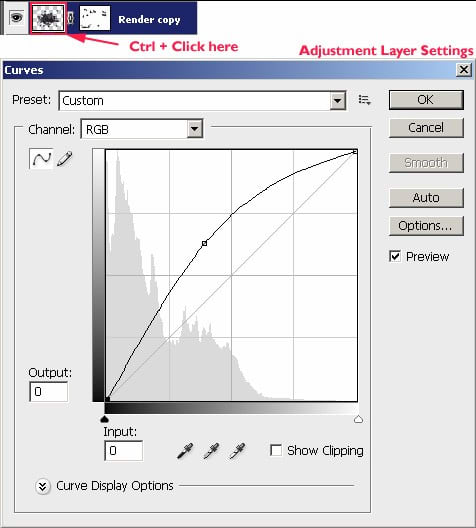
Make a selection of the layer used in Step 8, by doing Ctrl + Click on the Layer. Add an Adjustment ‘Curves’ Layer by going to Layer > New Adjustment Layer > Curves, or by using the Icon in the Layers Panel. Use a curve similar as shown in the image below, and apply it. Because we selected the render first and then added the Adjustment Layer, the Adjustment Layer will only apply to the selection. This will result in making the render more bright.
Step 10
Duplicate the ‘Render Copy’ Layer (the Layer from Step 8), so we don’t have to do the erasing in the Layer Mask again, as the Layer Mask will also be duplicated along. Move this layer above the Adjustment Layer we added in Step 9. Set the Blending Mode of this Layer, ‘Render Copy 2’, to overlay. Apply the Find Edges filter (Filter > Stylize > Find Edges). Now the image will look like this:

Step 11
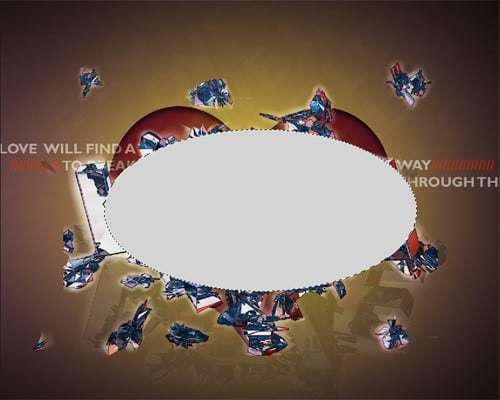
The image still looks somewhat flat, so perhaps we could add some more light in the middle. Add a new Layer (Ctrl + Shift + N), name it for example ‘Light’, and draw a oval as big as the heart using the Elliptical Marque Tool (M). Fill this, by using the paintbucket (G), with a light gray color, for example #d4d4d4.
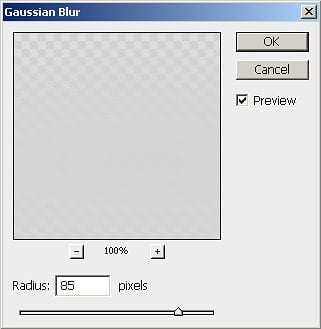
Now apply Gaussian Blur to this layer (Filter > Blur > Gaussian Blur), using the following settings:
Finally set the Layer’s Blending Mode to Overlay, and you should now have something like this:

Step 12
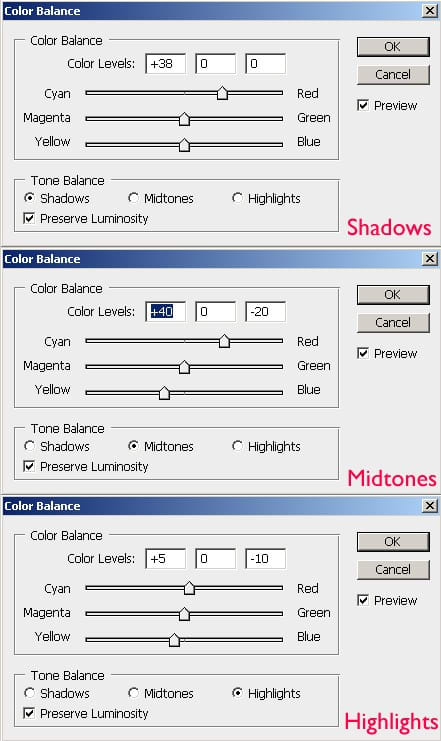
It already looks good, but still a bit dull, and not enough into the essence of the image. It should be somewhat stronger. Thus the last thing we need to do is to add some more red color. Add a Color Balance Adjustment Layer (Layer > New Adjustment Layer > Color Balance or use the icon in the Layers Panel), and use the following settings:
Finished!
Congratulations, you finished this tutorial and you’ve managed to make a lovely wallpaper. The outcome should be something like the image below:
